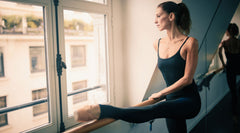
Here are fourteen ballet pointe tips to improve your pointe work and help you get a better position en pointe. These tips were part of a recent Instagram challenge hosted by Sarah Arnold fromThe Accidental Artist. Sarah Arnold is a former professional ballet who has been teaching ballet for over 30 years.
Tip #1 - Add a Theraband or stretch band
You always hear that the battement tendu is important for improving your feet. That is true! Add a Theraband or stretch band and you have a faster route to improving your strength and look of your foot.
The basics:
Tie a stretch band to a barre or anything sturdy, one dancer in the challenge used their piano for a support.
The band is tied in a loop.
Stand in first position with the band across the front of your ankle.
Tendu to the side through 3/4 pointe and lead with the front of your ankle. You should feel a good amount of resistance and it should also challenge your standing leg.
Keep rotating both legs as you work. Do not twist your hips or knees.
Close with the same energy and resistance through the instep and floor.
Repeat 4-8 times on each side.
The bonus of this exercise is that it will also help you with your échappé relevé.
Tip #2 - Use your core, your leg strength and intrinsic muscles of the feet
Lack of stretch across the front of the ankle is one of the most common issues for dancers struggling to improve their pointe position. The front of the ankle needs to be in straight line from the hip to the knee and intersect the ankle bone in a straight line.
In Tip #1, we learned a tough and effective exercise for leading your tendu with the front of the ankle joint. The slowest way to improve this position is through stretching-- yes I said it! It takes years to stretch your feet if done correctly. However, for this tip, I will teach you how to improve your pointe position by building strength and using imagery instead of stretching. You can improve strength faster than stretching.
Instead of thinking of pushing over your box, imagine rising onto top of it to a higher place. Use your core, your leg strength and intrinsic muscles of the feet. Stand on top of your box, but do not lean to get into the position. By lengthening and lifting up & down through the feet and legs, we can create a longer line. If you push, you could possible overdevelop your quad muscles around your knees. No dancer wants that.
The basics:
Face the barre (or something sturdy to hold onto).
Rise (élevé) onto pointe in parallel position.
Plié sur les pointes and feel the stretch across the front of the ankles.
Straighten your legs and try for the optimal alignment stated above.
Roll down smoothly and repeat 3 more times.
Try it next time in first position. The ball is not necessary but it is a cue for finding those adductors while en pointe!
Tip #3 - This tip will help you roll down from pointe smoothly and shift your weight en pointe
The basics:
Stand in first position facing the barre. Tendu one leg to the side and shift your weight onto the extended leg into a forced arch pose. Be sure to create your perfect line en pointe in this pose. Try to maintain it on each rise and change of weight.
Change your weight as you rise up and press the ankle forward where your ribbons cross. It is crucial to keep the lift upwards through the hip bones when transitioning through first on pointe to the forced arch pose.
Elongate rather than just shifting your weight forward onto your ankles and arch. Always feel activity through your intrinsic foot muscles and toes. This will help you to not sink into the box.
Front foot “knuckling” on pointe. You can see the metatarsals in her shoes because her feet are sinking into worn out shoes. Be aware that you can sink even in new shoes.
Tip #4 - Stretch and strength for the legs and core
Some dancers’ legs stay bent when extended. I have my students do an exercise to help feel the straight line on the back of the knee. Some legs are formed in such a manner that the knee will never flatten against the ground. My assumption is that this is anatomical. Sometimes, I have observed that younger dancers need to “grow into” their coltish knees and the line improves with age. But most of the time, I think the dancer could strengthen their legs and core!
The basics:
Strengthening exercise
Sit on the floor with the legs outstretched in front, knees as straight as possible.
Never force the knees down to the ground but sit up tall and engage the leg muscles.
Attempt to get the back of the knee to approach the floor.
Sometimes the dancer’s leg line improves and sometimes it does not. However, their legs, lower back, and abdominal strength always improve. It also gives them a chance to feel the length of their legs that they should feel when standing.
Tip #5 - Practice how to roll down from pointe
The exercise:
Rise up in first position. Keep hip bones lifted.
Plié and rotate while on pointe.
Straighten and stretch upward out of the box, bring your heels all the way up, lift.
Begin to soften the back of your knees.
This initial release is the first movement to roll down. Keep the lift on the knee caps. Arches up — tail down — lift up the front of your torso, and down the back!
Tip #6 - Forced arch to the front
The basics:
Tie a stretch band to a barre or anything sturdy.
Stand in parallel 4th position with the band across the front of your front ankle.
Keep the lift out of the hips as you move. Keep the shoulders and hips facing front.
Plié on the front leg and press the front of that ankle into the band.
Shift your weight to the back leg and alternate 8 times.
Switch legs and repeat.
Tip #7 - A short exercise to build strength and awareness in your toes
In this exercise, you will develop a greater use of the pads or tips of your toes!
The basics:
Start in first position, hold on to the barre with two hands. Later, progress to one hand on the barre.
Elevé (rise with no plié).
Lift up tall out of your hips, spine and core as you release the very tips of your toes. Do not release to 3/4 pointe, that is too far.
Press back up to full pointe, repeat again with another tiny release to the pads of your toes.
Repeat 8 times.
Building this strength and small motor skill will fine tune your roll down from pointe!
Tip #8 - For those dancers who “knuckle” or “sink” in their shoes
This exercise was given to me by Alyson Deane, former Principal Dancer with San Francisco Ballet many years ago.
I had a habit of sinking into my pointe shoes. Most of my dance life has been spent on strengthening my feet and ankles. This exercise is a wonderful help to a mobile or weak foot and ankles.
Never expect the shank or box to do the work for you.
The basics:
Plié and roll up and over the pointe shoe.
Pull back your metatarsals (the joints where your toes meet your foot).
Straighten your knees but keep your arch line protruding forward from your the front of your insteps WITHOUT bending your toes. We point our foot, not our toes.
It does not matter if one foot gets positioned before the other.
Tip #9 - The evert/invert exercise for ankle strength and stability should be a staple of every dancer’s conditioning repertoire
There is one big reason that you need to strengthen the muscles surrounding your ankles - TURNOUT.
When you begin to work on increasing your external rotation, you challenge your foot placement and strength. This exercise is beneficial because it works the foot not only in an everted/turned out position but also inverted. This will bring balance to your stance by limiting pronation (rolling in) and supination (rolling outward).
It will strengthen your peroneals which are important for your pointe work!
The basics:
As you get stronger, you will need a stronger strength band. I use the grey one by Theraband because it is a perfect resistance to challenge your ankles and feet!
Evert is going away from your center line and invert is towards your center line. Work up to 3 sets of 8 per side of each.
Note: this is a micro movement that does not use your leg or hip rotators in the movement. You will feel some stabilization at the top of your leg but the movement is in the ankle only.
Tip #10 - When you are en pointe, feel the same pressure through the big toe as you balance and while turning!
Develop your relevés by using your big toe to press down against the floor.
While on demi-pointe, press your big toe against the floor. This action will give you more stability. If should feel like you’re tendu-ing “into the floor“!
Tip #11 - “Big toe push-ups” A strong big toe is vital for a ballet dancer
It can make your relevé higher. A demi-pointe can become a 3/4 stance.
It provides stability in all relevé poses. It helps you push off for a jump. It develops your instep. The big toe has the most surface area and is a contact point for the “tripod” of your foot.
The basics:
Sit on the floor with one foot in front of you
Lift your big toe up
Hold it with your hand and create resistance by lifting up on the toe as you press it down.
This is a delicate muscle. 3-5 times per toes is adequate.
Tip #12 - The Holy Grail - “Doming”
“Doming” is my favorite ballet conditioning exercise for the feet. It creates strength and awareness in the intrinsic muscles of your feet. This not only brings stability to your stance but also helps prevent the overuse of incorrect muscles. This will improve proper muscle memory (proprioception).
The basics:
Slip your hand under your foot to feel the arch lift up and away.
Keep your big toe in contact with the floor and press your other toes into the floor. You are targeting the intrinsic muscles which will lift up from the floor. Pull your toes back towards your metatarsals.
Be sure to not let your foot rock in or out. Keep it stable and in a neutral position.
Start with 5-6 reps and build up to 8 for 2-3 sets. This exercise is the BEST for getting general stability on your standing leg through your smarter feet!
Tip #13 - We call it “pin and spin”
The basics:
Take your ball, I use a small spiky ball but you could use any ball that you can tolerate with the pressure, and place it just in front of your heel. Do not place it on the bone.
Press into the ball and create some force.
Slowly rotate your body side to side with the ball “pinned”.
Go forward and back with the grain of the muscle.
Move the ball to a new place in front of that area.
Repeat all.
In the video, I also added my exercise for spreading the toes on the ball. This is a “feel good” technique for me but I use it specifically for one of my students who used to scrunch her toes. I say “used to” because she has unlearned this habit and this technique was a big help. Scrunching your toes in tendu or on relevé can lead to many problems.
We spend too much time in shoes that inhibit our foot movement, including ballet flats and pointe shoes. An even better reason to give your feet some TLC.
Tip #14 - Stretching your feet with a foot stretcher
Should you use one? How do you stretch your feet to get the desired line necessary to get onto full pointe?
Often I recommend that the dancer massage their feet regularly and warm up with pressure releases. I still think this is a healthful solution but if you want a foot stretcher, consider one like the one in my video.
Reasoning:
I have never seen foot stretchers with a theraband attached instead of a rigid strap. The elasticity in the band allows the dancer to position their foot for more or less stretch.
My recommendation is to show your teacher how your foot is positioned in the stretcher. Then you can work on your stretch correctly and without sickling.
I like that it does not force the toes to curl or bend too much at the metatarsals. The amount of pressure is up to the dancer as he/she positions the foot.
The basics:
The guideline for stretching is conservative, only 1-2 minutes the first week.
Use the heel pad to cushion your heel and keep it aligned on the hand held rod.
If you turn out the leg, it will feel like putting your leg on the barre. However, I found better results with the foot in parallel. At no time, should you feel pain.
Go easy, go slow and be consistent. Stop if you feel any jamming at the back of your ankle.
I tested this out on six different dancers and all of them felt a stretch, no pain and liked the way their foot looked in the stretcher. We all agreed that it would be a useful product if you need to stretch your feet. Take a look at the photo to see the stretch across the ankle and the metatarsals of this teen’s foot. The arrow is pointing at the part of your foot and ankle where you want the most stretch. As you can see on the top photo, that area has less of a curve.
The theraband can be adjusted to a looser but not a much tighter fit by its velcro attachment. It works well for women, girls, and even men’s larger feet.
Now there you have it— 14 tips for your pointe work! Would you like 14% off Beginning or Intermediate Pointe Class videos? Click here! The code is: Take14OffPointe
Postscript from Zarely:
We at Zarely are immensely happy that Miss Arnold agreed to share some of her expert knowledge with us, and hope you found this helpful to your own journey in the wonderful world of ballet. One of our foremost goals of cultivating a community around us is exactly this - to create a platform from which knowledge and inspiration, from the world’s foremost ballet teachers and top dancers, are readily available to both upcoming and already-accomplished dancers around the globe. Thank you for reading!